Tromppottery
Sea Buckthorn Berries Decorative Functional Porcelain Pottery Bowl
Sea Buckthorn Berries Decorative Functional Porcelain Pottery Bowl
Couldn't load pickup availability
Sculpted Sea Buckthorn Berries with Leaves Bowl
Measures: 4-1/4" wide x 4-1/2" high
If you include the dark, glossy rim, this bowl has five (5) distinct bands of patterns and colors.
For some reason when I make bowls with berries on them, they end up with a lump, or bubble SOMEWHERE on the bowl.
This bowl is NO exception!
In the main photo - second bird from the LEFT - there is a bump on the surface.
It doesn't affect the function of the bowl, it just gives me a reason to mark the price down a bit, as not everyone likes bumpy birds.
Also, if the rim seems a bit out-of-round, into the slightly oval shape, it's because SOMEONE (me) tapped it in its raw state. (greenware state).
Even if you didn't notice these two incidentals, it's important for me to describe them, as I know they are there.
We color our own porcelain clay, and the porcelain for this bowl is a very pale Titanium Yellow. Just enough to warm up the stark whiteness of the porcelain.
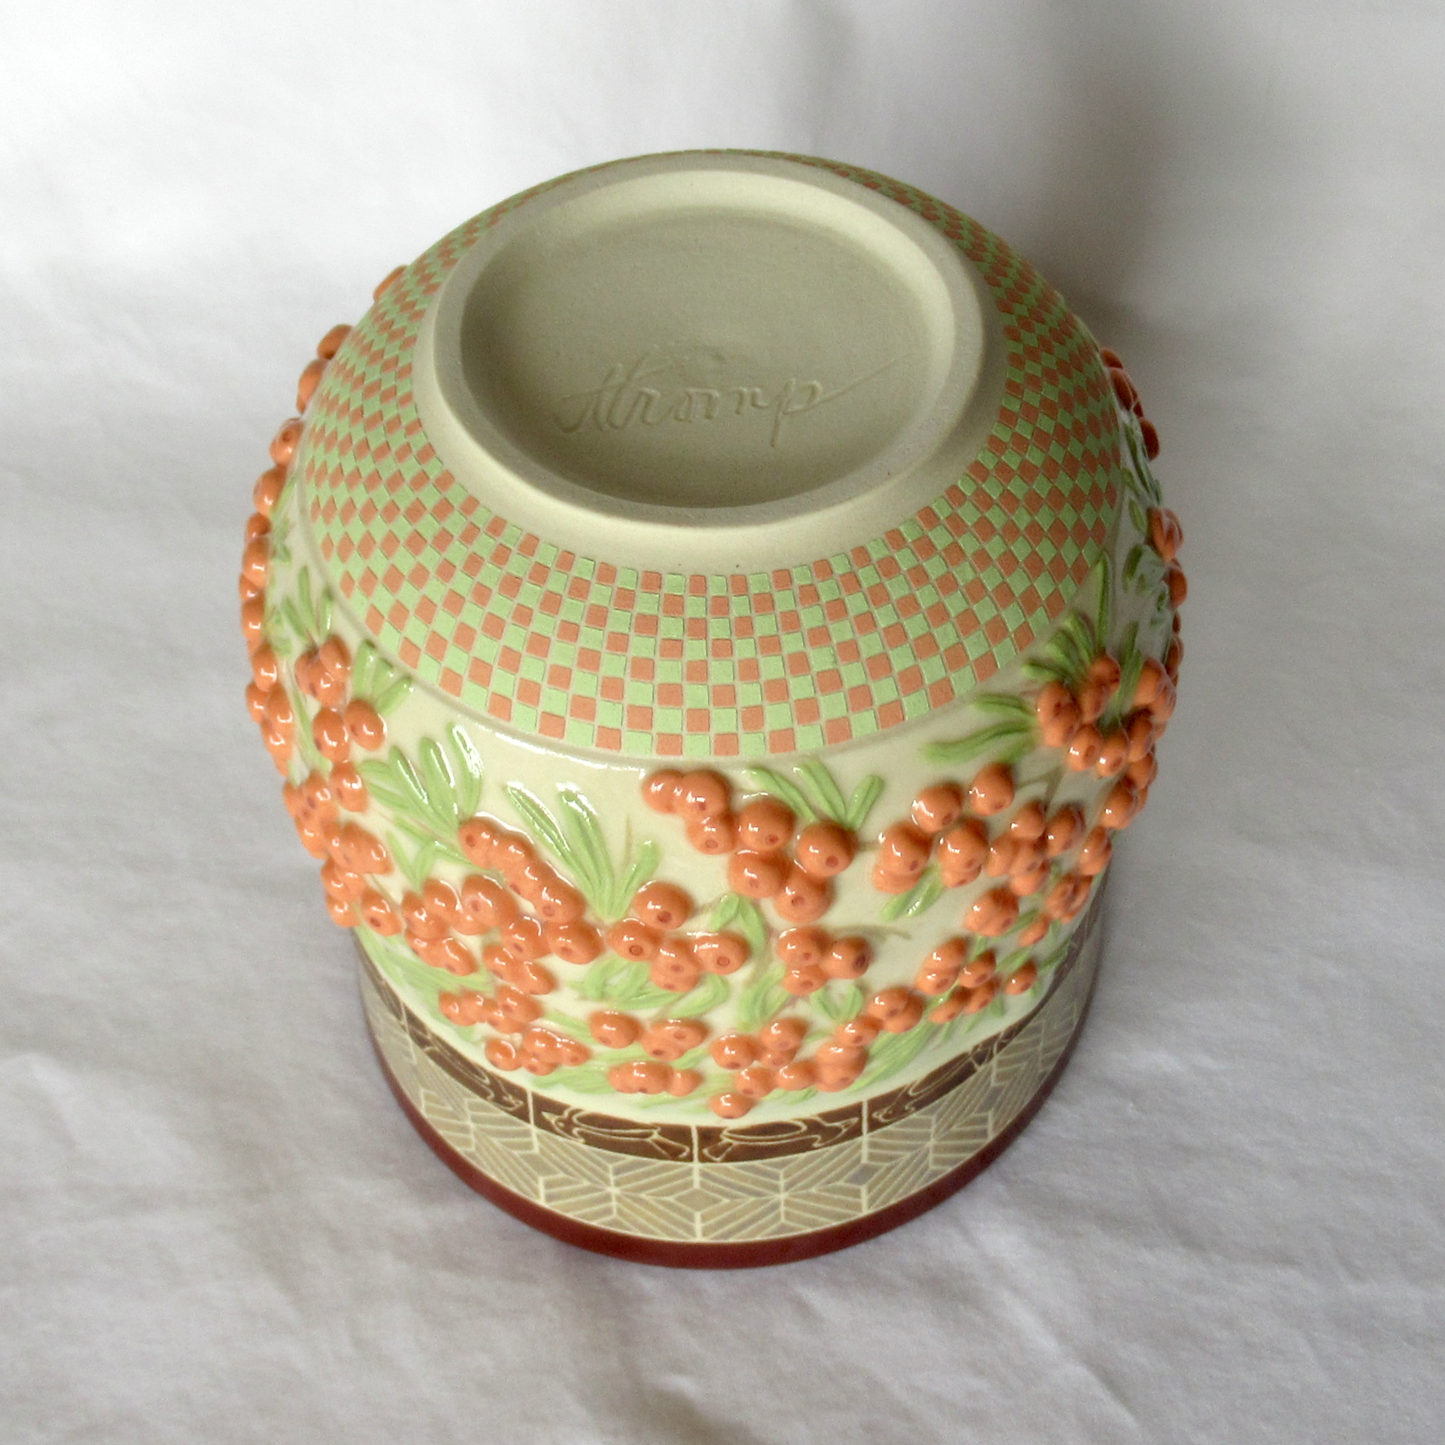
Let's start at the bottom, right at the foot ring.
I am starting something new to our handmade porcelain pottery - a narrow footring.
Sometimes I feel that handmade pottery has clunky footings; the pottery that HAS footings. Some potters keep flat pot bottoms, but for some reason, I am partial to a footring.
There are many technical reasons why footings are important, however, I am drawn to the aesthetic of the footring. It adds a visual element, defining the base of the pot and creating a more finished look. I also like how the footring raises the pot up off the surface, and allows a smaller area to touch the surface on which the pot sits.
Less scratches, perhaps? I think the pottery is better protected from scratches, as well as the "table" the pottery sits on.
Also, I sand all of our pottery on a potter's wheel, mounted diamond disk. As the wheel whirls around, it sands the footring very smooth, hopefully avoiding scratches.
Now that we have our footring explained, I'll go through the process of each decorative band.
Jumping over the first band from the bottom, and starting at the second band from the bottom - created while the clay was still in its raw state:
Two bands up from the footring is the sculpted Sea Buckthorn Berry and leaf band.
This band was formed while the clay was still in its raw state; after the bowl was wheel-thrown, but before the initial bisque firing.
Branches were carved into leather hard clay in the direction berries would be attached to them, around the circumference of the bowl, filled with light brown colored porcelain clay, and smoothed flush to the surface (mishima technique).
I crafted a small "berry mold" by pushing (multiple times) a large, round ball tool into leather hard clay (damp clay; not wet, not bone dry). All I did was wait for this mold to dry, and it was ready to use. No firing needed. No special plaster mold. Just "Necessity is the Mother of Invention" type of clay mold.
Orange colored porcelain was pressed into this homemade mold, and the berries placed onto the leather hard clay using slip (wet clay).
A small dot was then stamped into the plump berry forming the bobble at the berries' tips.
Green colored porcelain was rolled into a narrow strips and strategically placed around the berries.
This entire band is covered with three thin coats of lead-free, dinnerware safe clear glaze.
The bowl was then bisque fired to Cone 04. (1945 degrees Fahrenheit), and decoration continued:
NOW, back to the first band up from the footring; a checkered pattern.
After the first firing (Cone 04; 1932 degrees Fahrenheit), a lot of very narrow tape was strategically adhered to the bisque pot. Each strip of tape points to the center of the bowl's bottom.
Underglaze was applied to each check, created by the negative space between the narrow tape lines. Alternating the buckthorn orange and a lighter hue of the green buckthorn leaves - 2 coats of underglaze on each check.
This band is left without a clear coat on top, so the surface feels a little rougher than the glazed areas.
The third band up from the footring; waxwing birds, as waxwings are frequent visitors to the Sea Buckthorn. Each of the 16 birds were hand drawn onto the bisqueware with a pencil, and carefully, with very small brush, glazed around the pencil lines. The pencil lines burn off in the second kiln firing.
I did attempt to keep the birds from eating the Sea Buckthorn berries while I was working, BUT I think they ate a few berries!
The fourth band up, or the second band down from the rim, is a taped geometric design constructed with very thin detailing tape. Each line has to be glazed individually, or the glaze could bleed under the tape design, leaving the lines jagged.
Three coats of glaze for each negative space the adhesive lines formed.
The fifth band up, is the rim, described below.
BOWL INSIDE:
The inside of this Sea Buckthorn bowl is a very fluid, glossy white glaze.
At the inside rim, where the white glaze overlaps the dark red Cordovan rim, a band of amber and purply-blue speckles was created; just below the Cordovan rim.
The swirl at the bottom inside is clearly visible through the white glaze.
RIM:
Glossy dark red Cordovan
Wheel-thrown Standard 365 Porcelain Clay.
Glazed with lead-free, dinnerware safe glazes.
Fired to Cone 6 (2232º Fahrenheit).
I recommend washing these hand crafted pieces by hand.
My signature is engraved on the bottom of the bowl.
All of our handmade pottery is either wheel-thrown or handbuilt in our North Carolina home studio.
Share